Monday, August 26, 2013

We're moving!

Nope. Not the blog. The entire family. My husband has accepted a new job and we are packing everything up and going for it. We've waited all summer long for the big moving day and it's finally here. Both of the special men in my life will start their new ventures on the same day next week. We will have very little time to get settled in before that happens so I'll probably be on a blogging break. We are excited about the all the newness in our life, but also hesitant. Our home hasn't sold yet, but in order to take this opportunity we're stepping out on faith and making it happen. We are prepared for busy times taking care of two homes, but hope it won't be for long. Please send us all your happy real estate thoughts. The cutting machine has now been disconnected. The paper has been filed away. And my scissors are packed.

Sunday, August 25, 2013

Product Rave.

I am in love with these wood chips from Freckled Fawn! I discovered them through my blog hopping travels. I had never placed an order with Freckled Fawn before so I didn't really know what they had to offer. I bought three sets. The clouds, the speech bubbles, and the arrows. I would of bought the stars too if they weren't sold out. Last night I used several pieces from the cloud collection on this layout of my boy on a very big cool old slide. I can't tell you enough that I love them. After I finished the above page I still needed a petting secession with my new wood chips. I opened the other boxes and looked them all over before I decided to store them in a cute little see through box. You should definitely get some.

Friday, August 23, 2013

Black & White.

The above page is a similar idea to the previous white page post. This time I added the use of white, black and the tone in between, gray. With a very square instagram print I chose to center my photo on top of the pattern paper grid. I used a piece of vellum under the photo to soften the edges. The playing cards spelling out M.O.M. and the wording stickers are both products of idea-ology collection by Tim Holtz. Notice: just under the green key is another playing card from that same collection using the back of the card for it's design. My favorite part of any page is adding the last few fun details. I started with the pearls and the black crystals on top of the black polka-dots. A trick I use often. I always love to layer the same color on top of any polka-dot. I attempted to use many other elements to add that special something to the page until I finally settled on the above green key. I loved it immediately! So, let's rename this one, black and white with a punch of green.


Thursday, August 22, 2013

White Page.

After seeing many white pages floating around in cyber space I knew I wanted to give one a try. I believe the thing that makes this page successful was waiting for the right picture. Previous to this, I made a white page for my son's album. I used bright brilliant Easter egg dying photos. It kind of worked, but not like this photo does. I mixed many different textures of white to create this page. I added the large bow which gave me a hefty knot perfect for the pins. I have used similar pins with Baker's Twine and smaller ribbons, but I am happiest with this result with the larger ribbon. I am pleased with this page and happy to check it off the list.

Monday, August 19, 2013

Gradient.

With all the paint swatch projects on Pinterest I was ready to create a page using a gradient of colors. I kept the process simple by selecting my colors from the pink cardstock I already owned. The title and loop-de-loop design is a nod to the crawling stage of babies. I chose a white background to really show of the gradient of pinks. I think this is a simple page with a bold statement.

Sunday, August 18, 2013

It's the birthday girl.

And she has a beautiful highchair banner. These babies always get photographed in their highchair on their 1st birthday so, why not decorate it? This banner came together pretty quickly the day before her party. I used the Martha Stewart Scoreboard to make the rosettes. I always use a hot glue gun to make my rosettes. I used my Cameo for the rest of the cutting. I cut the light purple letters first and wasn't happy with the way they looked. The letters blended in and needed something to make them pop. Using the offset feature in the software I went back and cut the dark purple letters. A pretty banner for a pretty birthday girl.

Friday, August 16, 2013

Happy Birthday Piper Eleanor.

Today is Piper's 1st birthday! And that means I get to give her & her family the secret scrapbook project I've been working on for more than a year. I will probably be the most excited person you've ever seen at a 1 year olds birthday party. I feel blessed to have this little peanut in my life and honored to make her this album. It was such a pleasure to work with her beautiful face this past year. Recognize this layout? Refer back to an older post named "Collection pages." It's the exact same layout with a few different elements. It's kind of like the girl version and boy version. This page was created using Time for Spring by Fancy Pants Designs. I finally got to use that owl ribbon I've had for a long time. I loved it when I bought it and have tried to use it on many other pages, but it never made that finally cut. I think it fits here perfectly. Warning: pink explosion ahead! I have many more Piper layouts to share.

Wednesday, August 14, 2013

Secret Scrapbooking Projects.

Are usually gifts and might be my favorite projects to do. I've made a few baby gifts and a few birthday gifts. I also documented my niece, Stella's first year of life. I gave her family a complete scrapbook on her 1st birthday. Hint. Hint. To what this post is truly about and why there has been a lack of new layout photos here on the blog. I am super excited that this secret scrapbooking project is coming to an end. I will also be happy to share all my goodies with you very soon. Next week will be busy around here so come back soon & often.

Saturday, August 10, 2013

Birthday Girl #2.

We have another birthday to celebrate next week. Piper. our fair baby is turning 1! The party will be at Momma Cece's (practically at the fair) so it was fitting to go with a fair theme. We agreed on carousel horses and girly colors, because it's her 1st birthday and we didn't want to go to circus like. I designed this invitation in Silhouette Studio using the print & cut feature. It's long and skinny and fits in a business envelop. Most of the hard working being done with the printer. I believe strongly that it doesn't pay to print at home, but I also have difficulties getting Studio files out of the program. When needing a large number of invitations, my solution is to print one and run to Kikos. You can't beat their price compared to buying new ink cartridges for your home printer. I printed all copies with the registration marks so I could cut out the ticket shape on my Cameo. I think it's perfect for our fair baby. More birthday post to come......stay tuned!

Wednesday, August 7, 2013

Kayaking.

The last Project Life related post for awhile. I grouped 3 Project Life frames plus my journaling together to create this page. The frames were all downloaded from Silhouette Store and cut with my Cameo. The more simple frame with nothing in it is actually the "happy" frame with the text cut out. The journaling was done using the sketch pen feature on the Cameo. I do not have the capability of printing on 12x12 paper. So that's when I tend to use the sketch pens most often. I arranged the frames on the computer screen to insure the correct placement for the journaling. I love the simple look of this page and it wasn't a time consuming page to complete.

Tuesday, August 6, 2013

The back side.

Unfortunately (or fortunately), your next page will also be divided. I wish I could figure out a solution so it wouldn't have to be, because then I'd use these page protectors more often. It's seldom that I have back to back pages that will work with this type of design. This is Eli's first page of his album. He had eye surgery in January. I usually only scrap happy life events and I considered this one of them. That eye gave us so much trouble and on this day our troubles were ended. The "big day" Project Life frame was downloaded from the Silhouette Store. 2013 has only improved from there.

Divided Page Protectors.

This is my cover page for this year using a divided page protector which are most commonly being used for Project Life albums. I am very happy with the final result considering it's something new to me. I used an Echo Park line called Photo Freedom which is also where the page protector came from. My main focus for my cover pages is always the year, but I also like to get Eli's name in there somewhere. Note: I had to get creative to come up with enough E's for my wording. "The best is yet to come" was stuck in my head and it's what I wanted to use. Instead of changing it I used an "&" sign for one E and a C with a line inserted in it for the other. I am completely fine with this method, because I have learned you only have to trick the eye when working with alphas.

Wahoo....

My replacement blade came in the mail today and my scrapbook machine works. I am back in business!

Monday, August 5, 2013
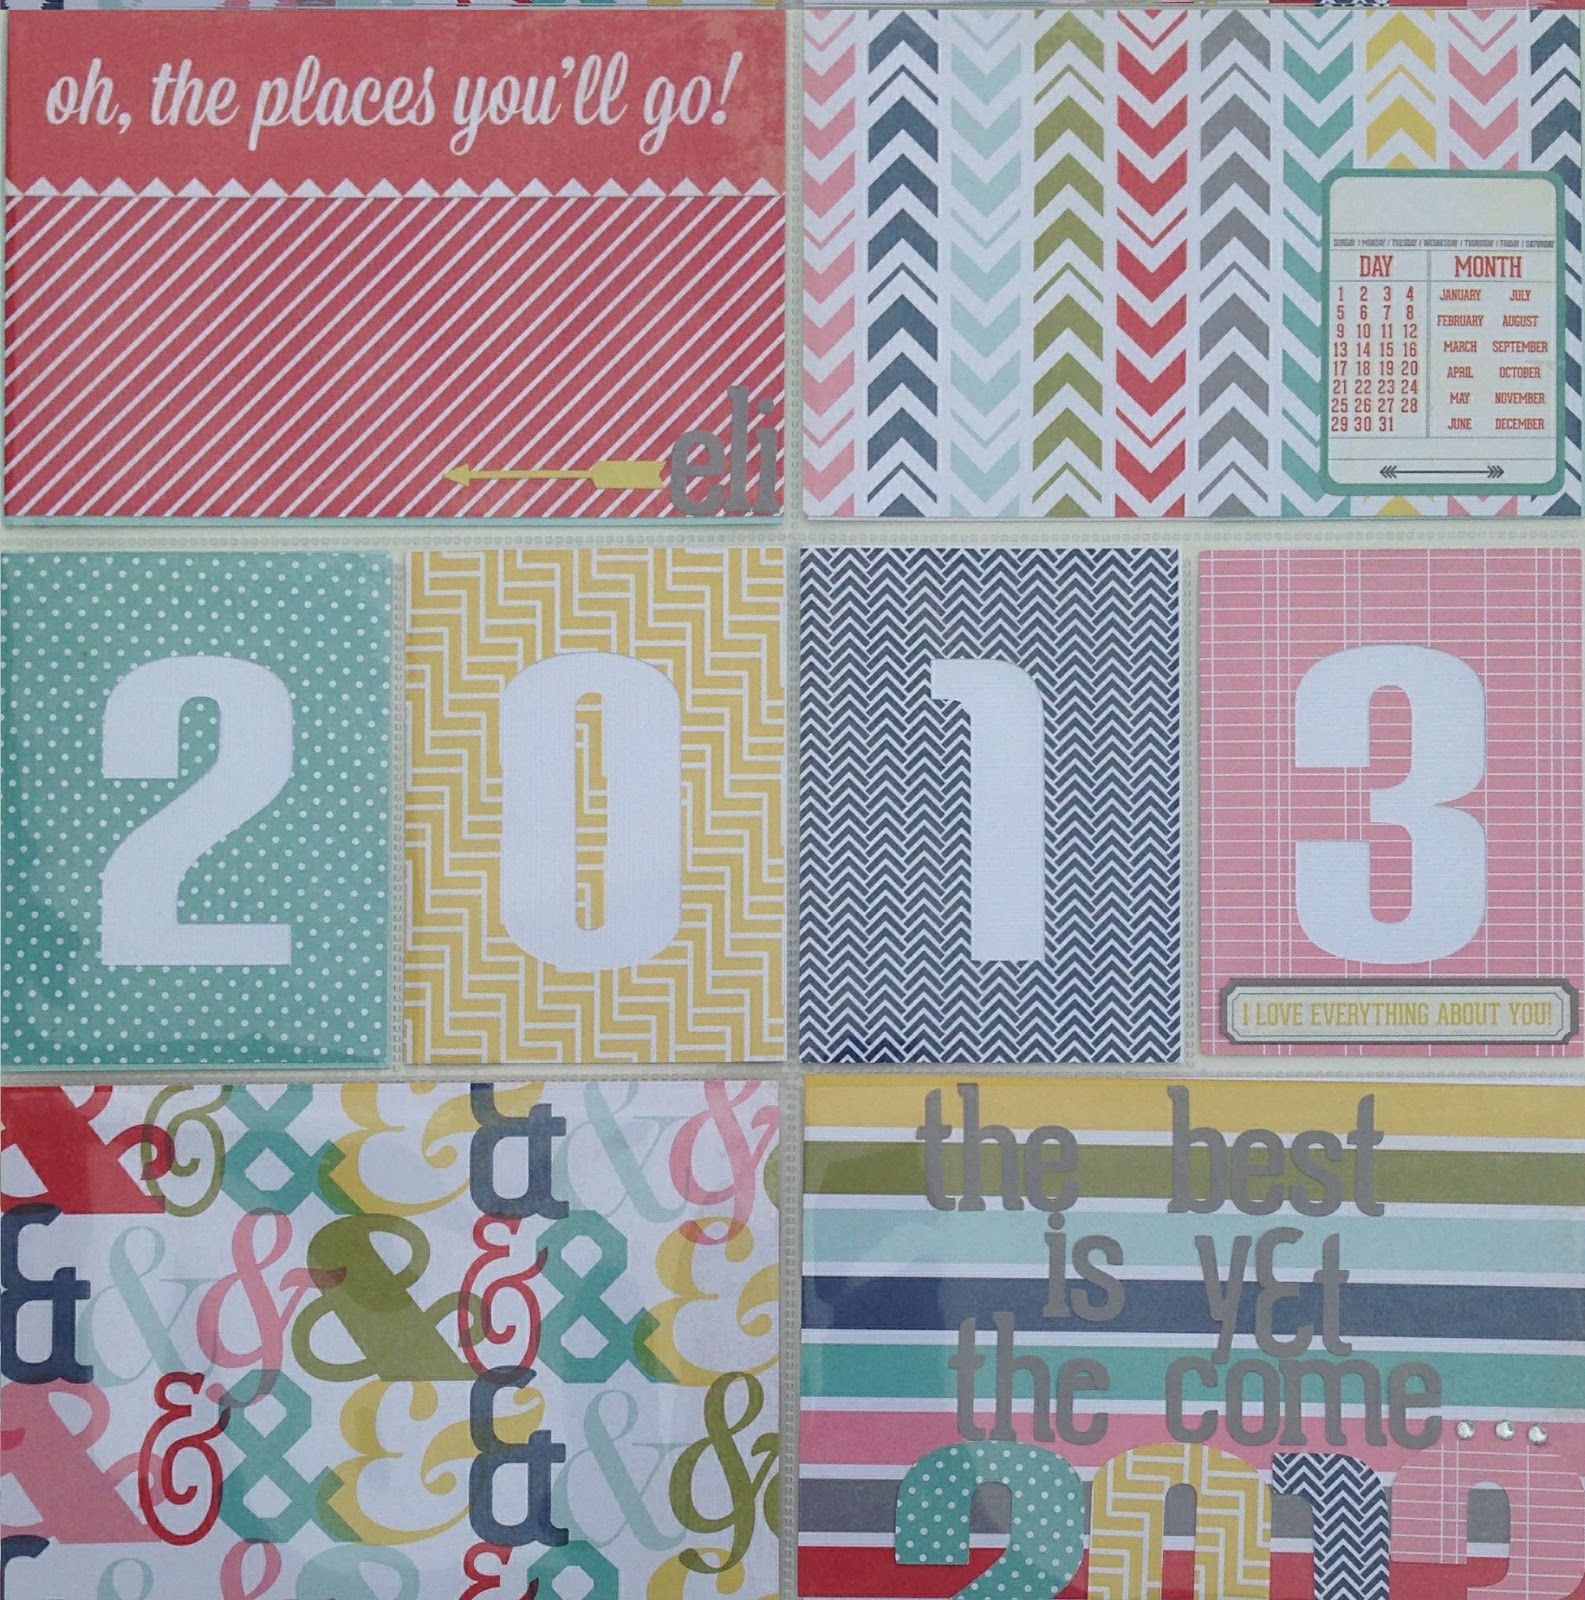
Project Life.

I don't scrapbook in true Project Life fashion, but that doesn't mean I'm not going to utilize their awesome products. I've started to slip in a divided page protector here and there. I think it changes up an album in a fun way. It works nicely for a large amount of pictures or pictures you don't want to crop. This years album actually starts with a divided page protector for my cover page. (I'll post that tomorrow.) So many scrapbook lines are putting out really fun journaling cards and frames. All of these items can be slipped into any page. The Silhouette store has a wonderful selection of frames and cards to download. I just finished a layout using Project Life frames arranging them in a grid-square pattern. (I'll post that the day after tomorrow.) Even if you don't want to scrap in a weekly Project Life fashion, don't overlook the elements for your pages.

Sunday, August 4, 2013

Happy Birthday Stella Rose!

We have a birthday to celebrate today. My beautiful niece turns 3. All she wants is a pink cupcake birthday party. I was hoping to make a "pin the sprinkle on the cupcake" game, but my Cameo had other ideas. Instead I turned this incomplete project into a birthday sign by adding some alphas. A little silly, but it will work for a pretty forgiving audience. It should be a fun day, especially for the little ones.

Saturday, August 3, 2013

Replacement blade.

All projects are put on hold until the UPS man drops off a box with a smiley face on it. And then I will smile too. I was having difficulty with my scrapbook machine the last few days. I actually thought the whole thing was broken, but now I am convinced that I just need a new blade. I am a professional internet shopper, but refuse to pay extra for faster shipping. This time I wish I had! I am putting this time to good use by planning out a few projects. I have also placed a paper order and ordered some instagram prints. I order them from Persnickety Prints. It's a service I found on the internet and was really happy with my prints last time. They print the photos square with many size choices. I recommend 4x4. Seems like I have some instagram pages in my future. So needless to say, I will be very happy next week when ALL my packages arrive.

Friday, August 2, 2013

Up, Up, and Away.

I knew the second this picture of my blue eyed boy popped up on my camera screen what I wanted to do with it. The angle of the photo with him holding the kite string was perfect for fabulous kite page. I cut the kites and their bows out with my Silhouette Cameo. I also cut the photo that became the blue kite with my machine. I don't always do this because I am too afraid my photo might get messed up, but this time I went for it. I am very happy how it turned out. I planned to mat my kites a little more center on the bright colored card stock, but when I walked away they shifted and I thought it was more fun this way. I used black & white Baker's Twine for the kite strings and playfully tacked them down with a Mini Glue Dot. I am super happy with the results of this page. I think it's fun and love the primary colors with the white background.

Thursday, August 1, 2013

Working with vinyl.

Isn't my favorite thing. Actually, I have a love-hate relationship with the stuff. I love the fact that it opens the door for me to create so many more things. But hate the sticky transfer process which seems to always cause me so many problems. I've made a few signs, water bottles, cups, and added our son's name to his bento boxes. I placed "Welcome" on our wooden door which I am super happy with. For the end of the school year I made the teachers clipboards with their name on it. All these small projects were practice for the growth charts I posted yesterday. Just the shear size makes the placement more difficult for me. Most of my anxiety comes from the fact that I hate to waste. I don't like to waste scrapbook paper and vinyl is even more expensive. I also feel like vinyl projects are more difficult to salvage once you've made a mistake. I have thought about doing a large wall piece for my niece's bedroom, but don't feel like I'd be happy with the final result at my current skill level. I plan to keep doing more small projects and maybe just someday I'll fall in love with vinyl.